
One Legal is California's premier eFiling and service of process provider, offering litigation support to law firms since 1990.
In just about every role in a legal office, you’ll find yourself creating multiple documents for clients, cases, and financial purposes. Each type of document will often require the same format with headings, logos, font types, spacing, and more.
Create templates and save for company-wide use to keep specific designs and stylings in place and ready to go. This one step can shave several minutes off the time it takes to produce each document, allowing you to work faster with less chance for serious errors.
Traditionally, it’s not uncommon to “Find, Rename and Modify” old documents to input new information. However this leaves a lot of room for error, and there’s a high risk of carrying over metadata from the previous file. Not to mention that this is a slow and unwieldy process.
Here’s a step-by-step guide to creating templates that will help you work more efficiently.
It can be tempting to use an existing document and build your template from there. Resist the temptation. Format changes and inconsistencies in that document will follow you into the next and increase the chance for mistakes.
Instead, start your template this way:

Now you have a fresh, new template to begin perfecting for present and future purposes.
Note: This process works for the following programs: Excel, Word, PowerPoint, Access 2016 and 2013 editions along with Visio Standard 2016 and Visio 2013.
You can also use templates from earlier versions of Office in 2013 and 2016 by saving the files to the Custom Office Templates folder. If you are working in an older version of Office, use this guide for templates in Word 2003.
When you open Word, a variety of settings are in place, including font (Calibri), size (11) and basic margins (1” all around) on the default document. If you know that your work documents require different settings, you can change these easily.
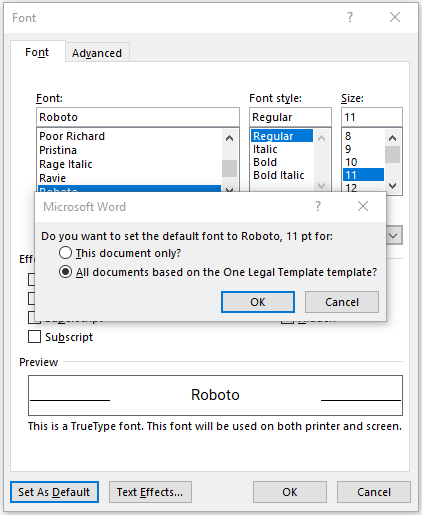
For default font:
Right-click anywhere on the page of your brand new template
For default margins:
You can open and set the Paragraph Indents and Spacing defaults the same way
Nearly every spacing, font or style option can be set as a default, just look for the “Save as Default” option in the dialogue box when setting your preferences.
Once you have the default settings in place, you can set up your styles. The Styles function allows you to create customized format options or modify existing formats which include font, color, and indentation options applied to headings, titles, lists, etc.
To set up the styles in Word 2016:
You can create as many styles as you need. Then when it’s time to use one type of heading or text in your document, the pre-designed style is already there.
Read to see One Legal in action? Experience the most convenient way to manage your California court filing, nationwide process serving, and courtesy copy delivery. Request a demo, now.